Plugin Guide
MirthSync Plugin Guide
Section titled “MirthSync Plugin Guide”Complete guide to using the MirthSync Admin Console Plugin. This page covers the interface, all features, common workflows, and best practices.
Interface Overview
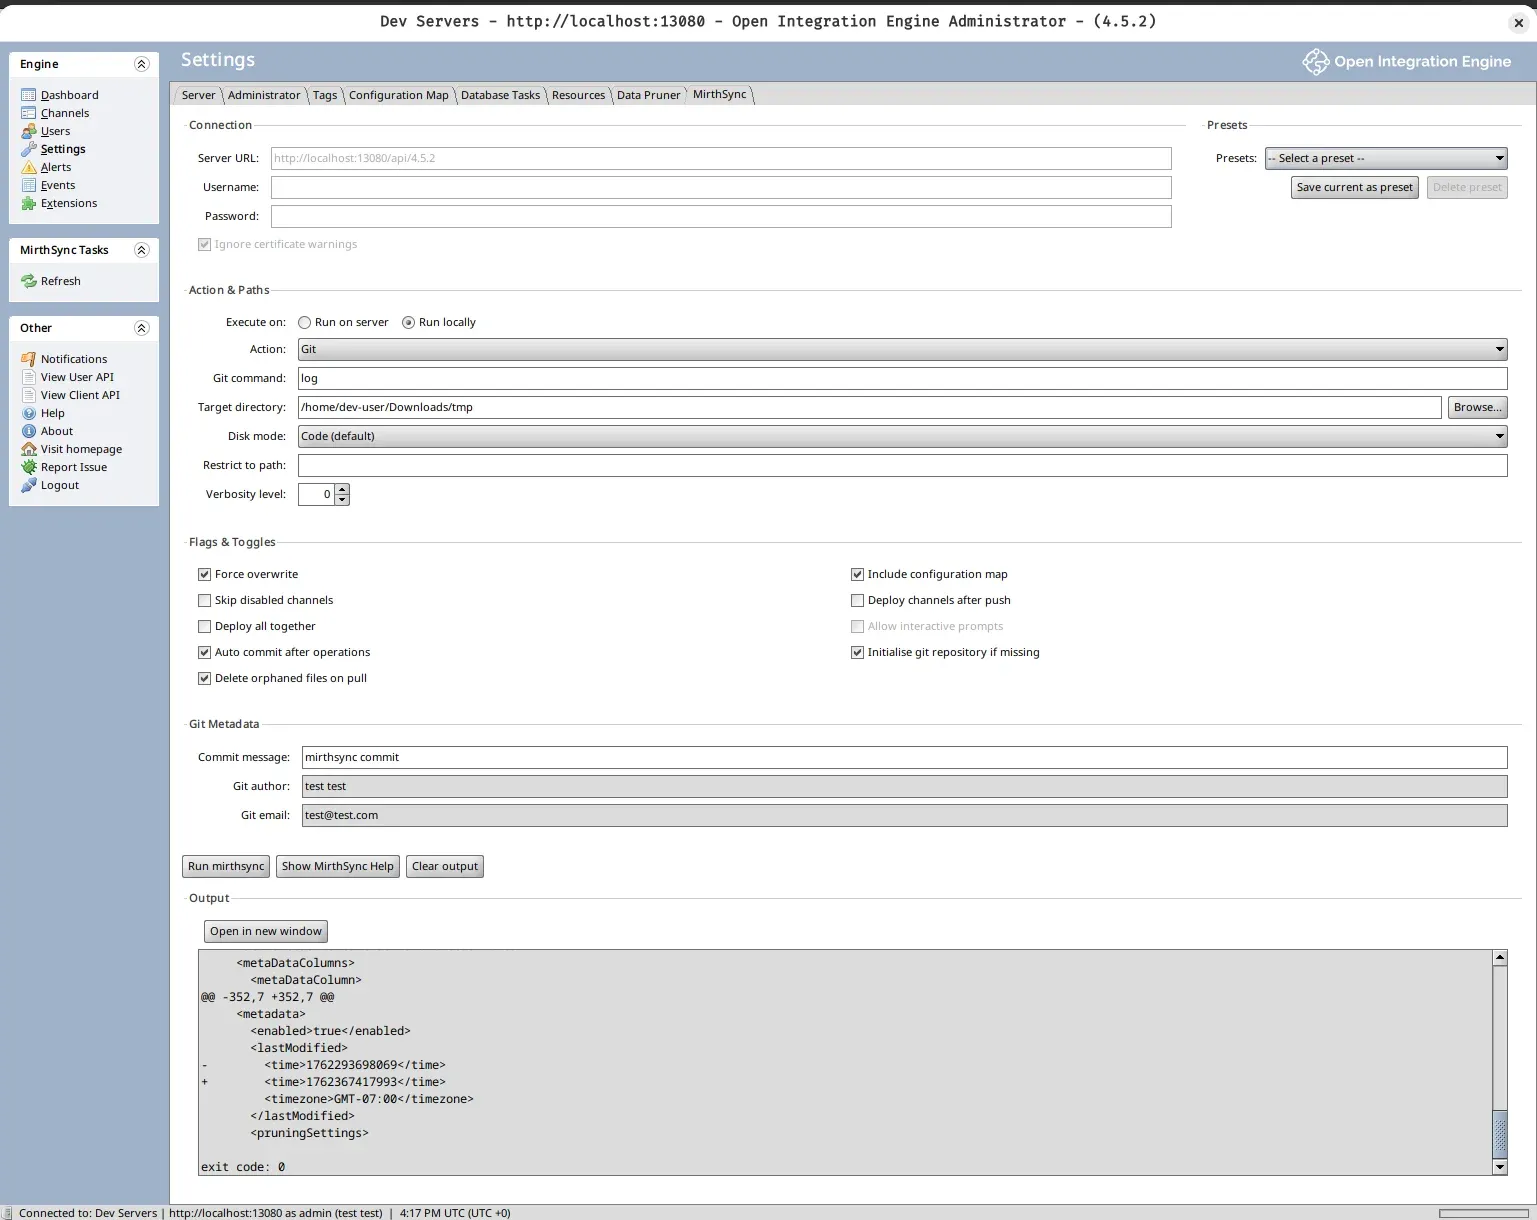
Section titled “Interface Overview”The MirthSync Plugin appears as a panel in the Mirth Connect or OIE Administrator console. The interface uses dropdowns, checkboxes, and text fields to provide complete version control functionality without leaving the Admin Console.
Key Benefits:
- No terminal required - everything is point-and-click
- Presets for one-click execution of common tasks
- Real-time output with detailed feedback
- Choose local or server execution
Connection Settings
Section titled “Connection Settings”Configure which Mirth Connect or OIE server to interact with.
| Field | Description | Example |
|---|---|---|
| Server URL | Mirth Connect/OIE API endpoint | https://localhost:8443 |
| Username | Admin username | admin |
| Password | Admin password | (stored in session) |
These settings tell the plugin which server to pull configurations from or push configurations to.
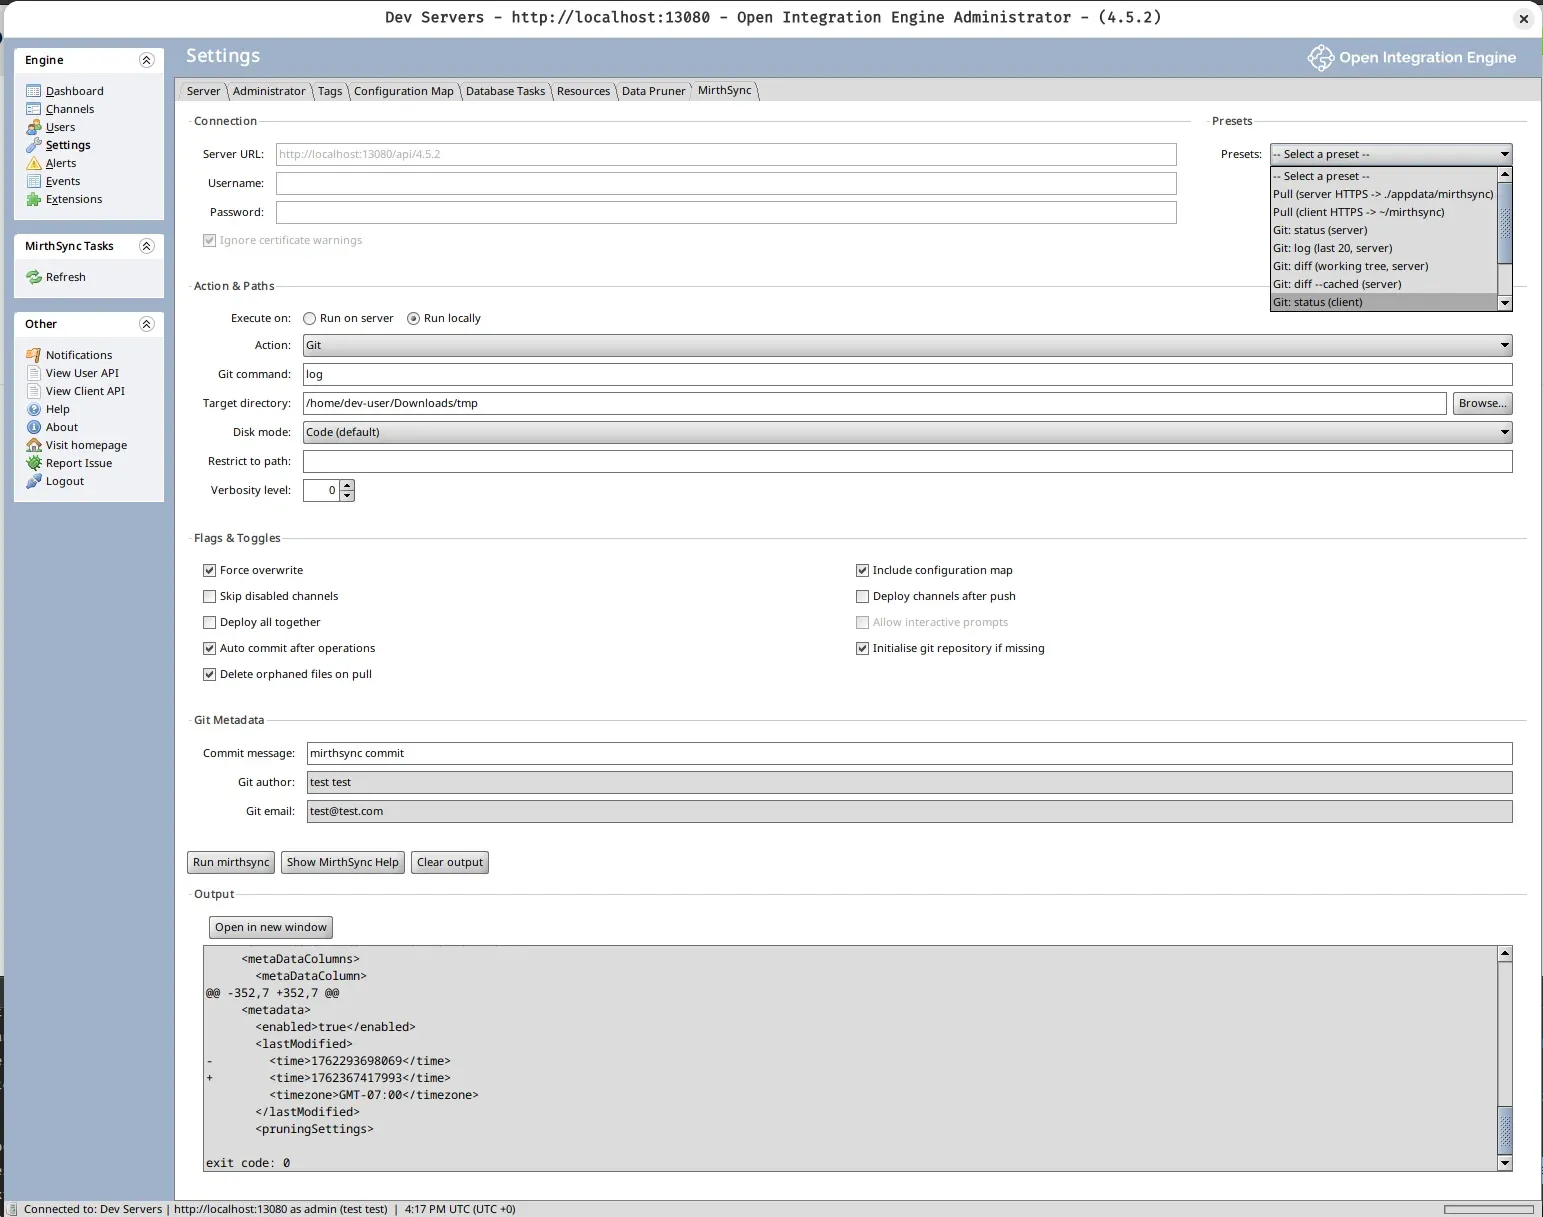
Presets System
Section titled “Presets System”Save frequently-used configurations for one-click execution.
What Gets Saved
Section titled “What Gets Saved”A preset stores:
- Selected action (Pull, Push, Git command)
- All flag settings
- Git metadata (author, email)
- Execution mode
Controls
Section titled “Controls”| Control | Purpose |
|---|---|
| Save | Store current configuration as a named preset |
| Load | Select from dropdown to load saved configuration |
| Delete | Remove preset |
Example Presets
Section titled “Example Presets”- “Dev Pull” - Pull from development with Skip Disabled Channels
- “Prod Deploy” - Push to production with Deploy All + Force Push
- “Daily Commit” - Git commit with standard metadata pre-filled
- “View Changes” - Git diff to review modifications
Action Selector
Section titled “Action Selector”Choose which operation to execute.
MirthSync Operations
Section titled “MirthSync Operations”| Action | Purpose |
|---|---|
| mirthsync pull | Extract server configurations to files |
| mirthsync push | Deploy file configurations to server |
| mirthsync git | Execute Git commands |
Git Commands
Section titled “Git Commands”When you select mirthsync git, choose from these Git operations:
| Command | Purpose |
|---|---|
| init | Initialize repository |
| status | Show current state |
| Command | Purpose |
|---|---|
| add | Stage files |
| commit | Save changes |
| diff | Show differences |
| log | View history |
| reset | Undo changes |
| Command | Purpose |
|---|---|
| branch | List/create branches |
| checkout | Switch to existing branch |
| Command | Purpose |
|---|---|
| remote | List remotes only |
| push | Upload commits |
| pull | Download & merge |
Execution Modes
Section titled “Execution Modes”Choose where commands execute.
| Mode | Executes On | Use When |
|---|---|---|
| Run Locally | Your workstation | Personal repos, local development |
| Run on Server | Mirth server | Shared repos, team environments |
How to choose:
- Local: You have a Git repository on your workstation and want to work locally
- Server: The repository lives on the server or you want centralized team access
- Mixed: Use Local for development, Server for production deployments
Pull Operation
Section titled “Pull Operation”Extract server configurations to files.
| Flag | Effect |
|---|---|
| Include Configuration Map | Extract server-wide settings |
| Skip Disabled Channels | Ignore disabled channels |
| Force Overwrite | Overwrite files without prompt |
| Deploy After Pull | Deploy immediately (rarely used) |
Workflow
Section titled “Workflow”- Select
mirthsync pullfrom Action dropdown - Choose execution mode (Local or Server)
- Check desired flags (e.g., Skip Disabled Channels)
- Click Execute
- View output to confirm files were extracted
Push Operation
Section titled “Push Operation”Deploy files to server.
| Flag | Effect |
|---|---|
| Deploy Channels | Deploy channels after upload |
| Deploy All | Deploy all configurations |
| Force Push | Overwrite without confirmation |
| Auto-Commit Changes | Commit before pushing |
Workflow
Section titled “Workflow”- Select
mirthsync pushfrom Action dropdown - Choose execution mode
- Check deployment flags (Deploy Channels, Deploy All)
- Click Execute
- Monitor output for deployment status
Git Metadata
Section titled “Git Metadata”Required for commit operations.
| Field | Example | Used In |
|---|---|---|
| Author Name | John Smith | Git commit history |
| Author Email | john@example.com | Git commit attribution |
| Commit Message | Update ACK timeout | Commit description |
Commit Message Best Practices
Section titled “Commit Message Best Practices”Short summary (50 chars max)
Detailed explanation of changes and reasoning.Reference ticket numbers if applicable.Good example:
Fix HL7 ACK timeout issue
Increased ACK timeout from 5s to 15s to handle slowdownstream systems. Resolves issue #127.
Workflow: Git Commit
Section titled “Workflow: Git Commit”- Select
mirthsync gitfrom Action dropdown - Choose
commitfrom Git command list - Enter Author Name and Email
- Write Commit Message describing changes
- Click Execute
- Check output for commit confirmation
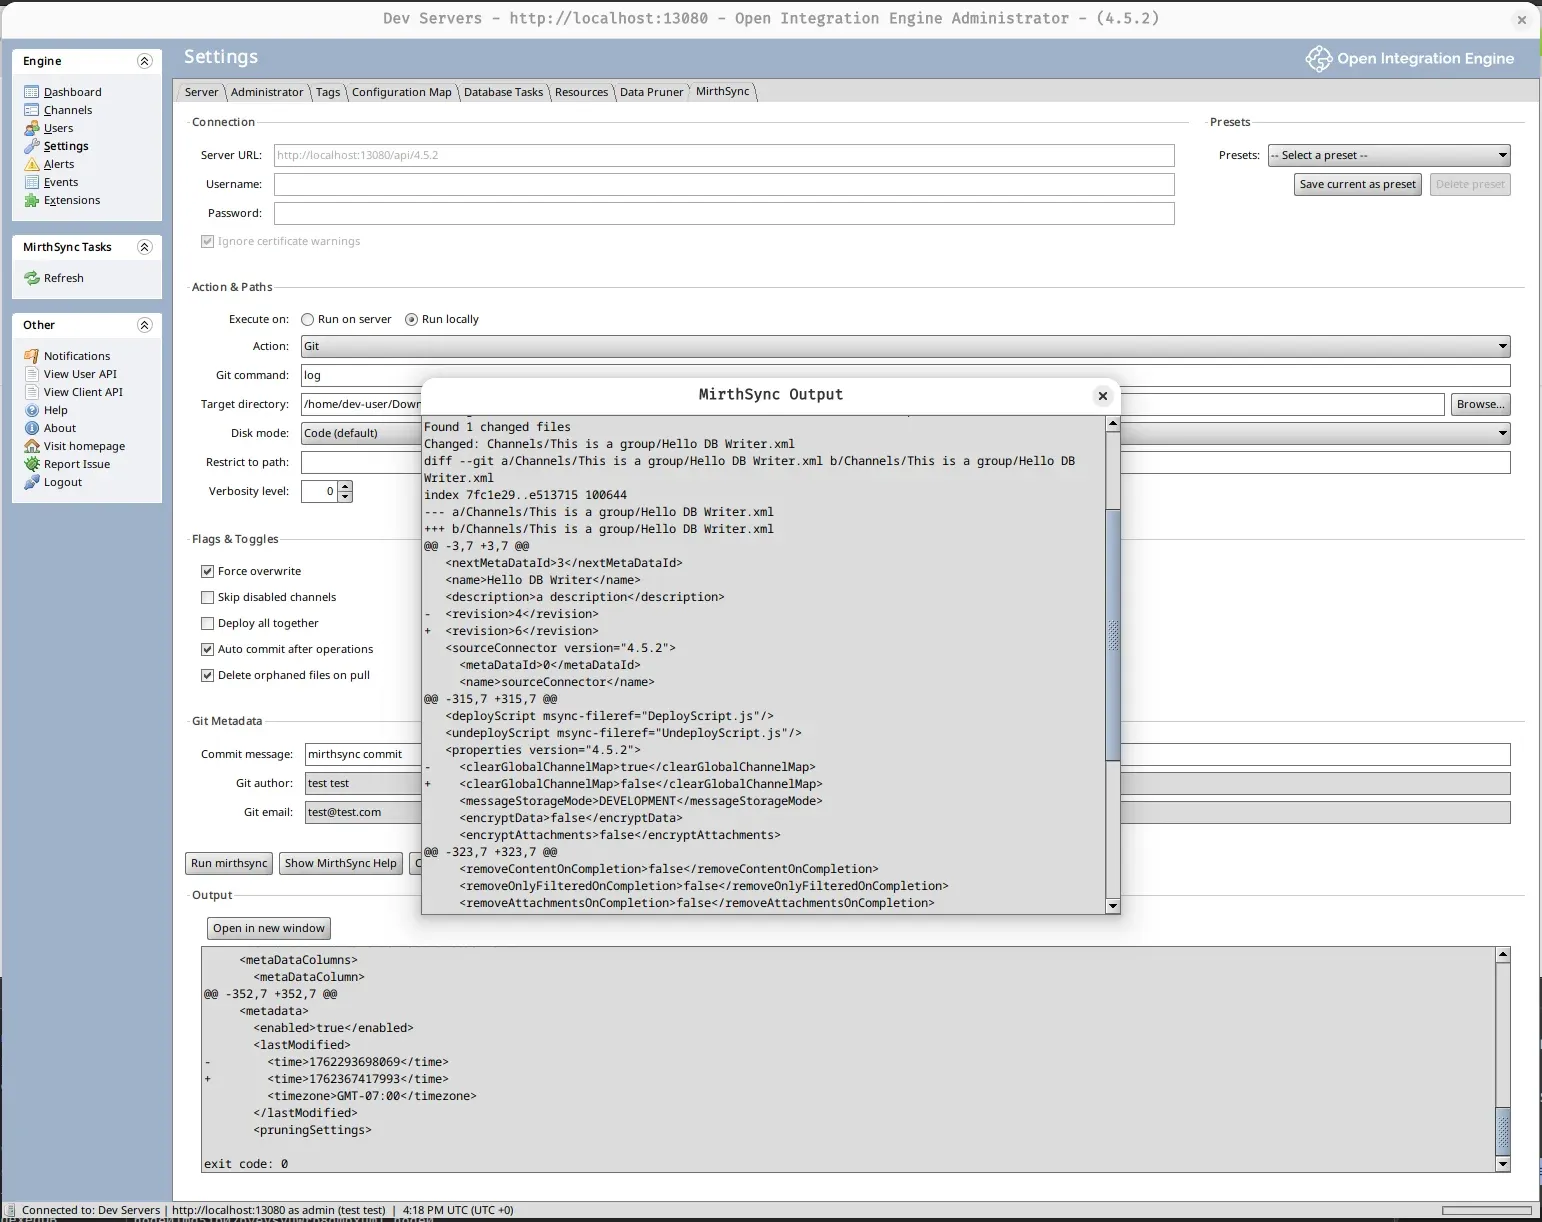
Output Panel
Section titled “Output Panel”Displays real-time results from command execution.
Displays:
- Command being executed
- Real-time stdout/stderr
- Success/failure status
- Execution time
- Git output (diffs, logs, status)
Actions:
- Scroll to review output
- Copy text
- Open in New Window - Separate output viewer
Common Workflows
Section titled “Common Workflows”Initialize Repository
Section titled “Initialize Repository”| Step | Action |
|---|---|
| 1 | Git → init |
| 2 | mirthsync pull |
| 3 | Git → add |
| 4 | Git → commit (with message “Initial commit”) |
Daily Development Work
Section titled “Daily Development Work”| Step | Action |
|---|---|
| 1 | mirthsync pull (get latest from server) |
| 2 | (Make changes in Admin Console) |
| 3 | mirthsync pull (extract changes to files) |
| 4 | Git → diff (review changes) |
| 5 | Git → add (stage files) |
| 6 | Git → commit (save changes) |
Deploy to Another Environment
Section titled “Deploy to Another Environment”| Step | Action |
|---|---|
| 1 | Git → push (upload commits to remote) |
| 2 | (On target environment) Git → pull (download commits) |
| 3 | mirthsync push + Deploy All flag (deploy to server) |
Work with Branches
Section titled “Work with Branches”| Step | Action |
|---|---|
| 1 | Git → branch (create feature branch) |
| 2 | Git → checkout (switch to branch) |
| 3 | (Work on feature, commit changes) |
| 4 | Git → checkout main (switch back) |
| 5 | Git → merge (combine changes) |
View Git Diff
Section titled “View Git Diff”- Select
mirthsync gitfrom Action dropdown - Choose
difffrom Git command list - Click Execute
- Review changes in output panel
- Optionally click Open in New Window for detailed review
Common Flag Combinations
Section titled “Common Flag Combinations”Development:
Pull + Skip Disabled ChannelsGet configurations but ignore channels you’re not working on.
Production Deploy:
Push + Deploy All (on Server)Deploy all configurations and ensure they’re activated on the production server.
View Changes:
Git diff (Run Locally)Review what you’ve modified before committing.
Safe Testing:
Pull (no Deploy After Pull flag)Extract configurations to files but don’t deploy them automatically.
Advanced Topics
Section titled “Advanced Topics”Remote Repository Setup
Section titled “Remote Repository Setup”Use Git → remote to configure remote repositories:
# Add remoteremote add origin https://github.com/user/repo.git
# Verifyremote -v
Then use Git → push/pull in the plugin to sync with the remote.
Authentication: SSH vs HTTPS
Section titled “Authentication: SSH vs HTTPS”| Type | Setup | Auth |
|---|---|---|
| HTTPS | Easier | Username/password or token |
| SSH | Requires key setup | SSH key |
Configure authentication outside the plugin at the system level:
For HTTPS:
- Use personal access token instead of password
- GitHub: Settings → Developer settings → Personal access tokens
- Create token with
reposcope
For SSH:
- Generate SSH key:
ssh-keygen -t rsa -b 4096 - Add public key to GitHub: Settings → SSH Keys
- Change remote URL using native git:
git remote set-url origin git@github.com:user/repo.git
Execution Mode Tips
Section titled “Execution Mode Tips”Local Execution:
- Fast for personal work
- Requires local Git repository
- Good for development and testing
Server Execution:
- Best for teams with shared repo on server
- Centralized version control
- Good for production deployments
Mixed Strategy:
- Use Local for development work
- Use Server for production deployments
- Keeps development fast, production controlled